Welcome to the Honeywell RTH6580WF installation manual, your comprehensive guide to setting up and configuring your Wi-Fi-enabled programmable thermostat for optimal performance and smart home integration.
1.1 Overview of the RTH6580WF Thermostat
The Honeywell RTH6580WF is a Wi-Fi-enabled, 7-day programmable thermostat designed for seamless integration with most HVAC systems. It offers advanced features like smart response technology, remote monitoring, and energy-saving capabilities. With its user-friendly interface, it allows homeowners to schedule temperatures, receive alerts, and control their heating and cooling systems via a smartphone app. This thermostat is ideal for smart home setups, providing convenience, efficiency, and compatibility with various HVAC configurations.
1.2 Importance of the Installation Manual
The installation manual is crucial for ensuring the proper setup and operation of the Honeywell RTH6580WF thermostat. It provides step-by-step instructions, safety precautions, and troubleshooting tips to guide users through the installation process. By following the manual, users can avoid common mistakes, ensure compatibility with their HVAC system, and optimize the thermostat’s performance. Additionally, the manual serves as a reference for advanced features, maintenance, and compliance with manufacturer guidelines, helping users maximize energy efficiency and system reliability while maintaining warranty validity.
System Requirements for RTH6580WF
The Honeywell RTH6580WF requires compatibility with standard HVAC systems, a stable Wi-Fi connection, and a compatible power supply to ensure smooth operation and smart functionality.
2.1 Compatibility with HVAC Systems
The Honeywell RTH6580WF is designed to work with most standard HVAC systems, including forced air, hydronic, and radiant systems. It is also compatible with heat pumps and dual-fuel systems. Ensure your system matches the thermostat’s voltage and wiring requirements for proper installation and operation. Refer to the manual for specific compatibility details to avoid installation issues. Proper system matching ensures optimal performance and energy efficiency.
2.2 Wi-Fi Connectivity Prerequisites
Ensure your home has a stable 2.4 GHz Wi-Fi network, as the RTH6580WF is not compatible with 5 GHz networks. A strong internet connection is essential for remote access and smart features. You’ll need your Wi-Fi network name (SSID) and password during setup. Additionally, create a Honeywell Home account or use an existing one to enable remote monitoring and control via the Honeywell app. A smartphone or tablet with internet access is required for initial setup and ongoing management of your thermostat.
Step-by-Step Installation Guide
This section provides a detailed, sequential approach to installing the RTH6580WF thermostat, ensuring a smooth and safe setup process for optimal functionality and performance;
3.1 Preparing Tools and Materials
Before starting the installation, ensure you have all necessary tools and materials. Gather a small screwdriver, wire labels, and a ladder if needed. Turn off power to your HVAC system at the circuit breaker. Prepare the thermostat’s mounting hardware and wires. Label each wire for easy identification during reconnection. Keep the manual nearby for reference. Ensure your Wi-Fi network details are accessible. Safety first: confirm power is off before handling wires. Being well-prepared ensures a smooth and efficient installation process.
3.2 Disconnecting Power and Removing the Old Thermostat
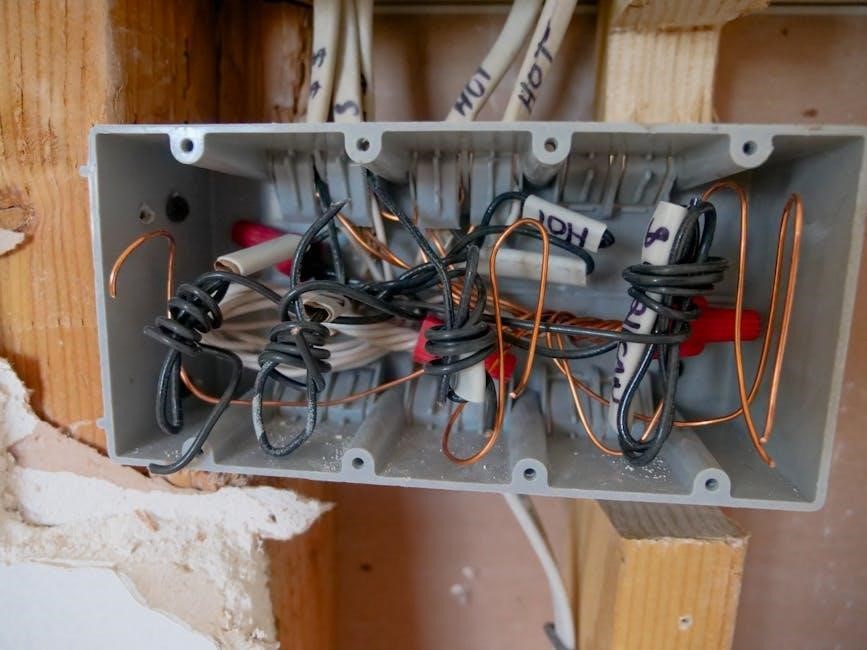
Begin by switching off power to your HVAC system at the circuit breaker or fuse box. Verify the system is off using a multimeter. Remove the faceplate of the old thermostat by gently prying or unscrewing it. Carefully pull the thermostat away from the wall, avoiding damage to the wires. Label each wire with its corresponding terminal for easy reconnection later. Do not remove wires from the wall; simply disconnect them from the old thermostat. Take photos or notes for reference. This step ensures a safe and organized transition to the new device.
3.3 Mounting the New Thermostat
Locate the wall where the new thermostat will be mounted, ensuring it is level and accessible. Use a screwdriver to attach the mounting plate to the wall using the provided screws. If necessary, drill pilot holes for secure installation. Gently pull the wires through the plate and connect them to the corresponding terminals on the RTH6580WF. Secure the thermostat to the mounting plate, ensuring it is tightly fastened. Double-check all wire connections before powering the system back on. Refer to the manual for specific wiring configurations to ensure compatibility and safety.
3.4 Connecting Wires to the RTH6580WF
Match each wire from your HVAC system to the corresponding terminal on the RTH6580WF. Refer to the manual for terminal labels (e.g., R, W, Y, G, C). Turn off power to your HVAC system before connecting wires. Strip the wire ends and securely attach them to the thermostat terminals. Ensure all connections are tight to avoid malfunctions. After wiring, turn the power back on and test the system to confirm proper operation. Consult the manual for specific wiring configurations tailored to your HVAC setup.
Post-Installation Configuration
After installation, connect your thermostat to your home Wi-Fi network and register it for remote access. Set temperature schedules and enable features like Smart Response Technology for optimal performance.
4.1 Connecting to Home Wi-Fi Network
To connect your Honeywell RTH6580WF thermostat to your home Wi-Fi network, navigate to the thermostat’s menu and select the Wi-Fi option. Choose your network from the list of available options and enter your password using the touchscreen interface. Ensure your router is operational and within range. Once connected, the thermostat will confirm the connection. For remote access, download the Honeywell app and follow the in-app instructions to link your thermostat. This setup allows you to monitor and control your HVAC system remotely, enabling features like scheduling and Smart Response Technology for energy efficiency.
4.2 Registering the Thermostat for Remote Access
After connecting your Honeywell RTH6580WF to your Wi-Fi network, register it for remote access. Download and install the Honeywell Home app on your smartphone or tablet. Open the app and create an account or log in if you already have one. Follow the in-app instructions to link your thermostat to your account by entering the unique thermostat ID located on the back of the device or in the menu. Registration enables remote monitoring, scheduling, and smart features like Smart Response Technology, ensuring seamless control of your HVAC system from anywhere.
Programming and Scheduling
Program your Honeywell RTH6580WF thermostat to maintain desired temperatures with customizable schedules. Use the app to set temperature adjustments and enable Smart Response Technology for optimal comfort and energy efficiency.
5.1 Setting Up Temperature Schedules
Open the Honeywell Home app and navigate to the “Temperature Schedule” section. Create a 7-day schedule by setting specific temperatures for different times of the day. For example, set a cooler temperature for nighttime and a warmer temperature during the day when you’re away. You can customize each day based on your routine. Once your schedule is set, save it to ensure the thermostat follows your preferred settings automatically. Use the “Hold” feature to temporarily override the schedule if needed.
5.2 Understanding Smart Response Technology
Smart Response Technology learns your home’s thermal characteristics to optimize heating and cooling. It preheats or cools the house before scheduled times to reach your desired temperature precisely when needed. This feature minimizes temperature fluctuations and enhances comfort. Enable it in the app under settings to let the thermostat adapt to your home’s unique needs, improving efficiency and performance while maintaining consistent temperatures throughout the day.
Features and Benefits of the RTH6580WF
The RTH6580WF offers advanced features like remote monitoring, smart scheduling, and energy-saving modes. Its Wi-Fi connectivity ensures seamless control via the Honeywell app, enhancing convenience and efficiency while maintaining optimal home comfort.
6.1 Energy Efficiency and Savings
The Honeywell RTH6580WF is designed to optimize energy usage, reducing utility bills while maintaining comfort. Its Smart Response Technology learns your HVAC system’s behavior to enhance efficiency. Features like scheduling and geofencing prevent unnecessary heating or cooling when the home is unoccupied. By programming temperature settings, you can avoid energy waste and lower your environmental impact. Remote adjustments via the app ensure energy-saving settings are always maintained, making this thermostat both eco-friendly and cost-effective for modern homes.
6.2 Remote Monitoring and Control
Experience unparalleled convenience with the RTH6580WF’s remote monitoring and control capabilities. Using the Honeywell Home app, you can adjust temperature settings, view current conditions, and receive system alerts from your smartphone or tablet. This feature allows you to manage your home’s comfort from anywhere, ensuring your HVAC system operates efficiently even when you’re not present. Remote access provides peace of mind and flexibility, making it easier to maintain a comfortable environment year-round without the need for physical adjustments.

Troubleshooting Common Issues
Address common issues like connectivity loss or display malfunctions by checking Wi-Fi networks, ensuring proper wiring, and restarting the thermostat for swift resolution and optimal functionality.
7.1 Resolving Wi-Fi Connectivity Problems
Wi-Fi connectivity issues can arise due to weak signals, incorrect network settings, or firmware glitches. Ensure the thermostat is connected to your home network, restart the router, and check for firmware updates. Verify the network name and password are correct. If issues persist, reset the thermostat by removing batteries or power, then reconnect. For severe problems, consult the manual or contact Honeywell support for assistance. Regularly updating firmware ensures stable connectivity and optimal performance.
7.2 Addressing Display or Sensor Malfunctions
If the display is unresponsive or sensors malfunction, restart the thermostat by disconnecting power. Clean the screen with a soft cloth and ensure sensors are free from obstructions. Check for loose wire connections and verify proper calibration. If issues persist, refer to the manual for troubleshooting steps or update firmware. For unresolved problems, contact Honeywell support. Regular maintenance ensures accurate temperature readings and reliable operation, optimizing your home’s comfort and energy efficiency.
Maintenance and Upkeep
Regularly clean the thermostat screen and ensure sensors are free from debris. Update firmware periodically for optimal performance. Schedule routine checks to maintain accuracy and efficiency.
8.1 Cleaning the Thermostat
Regular cleaning ensures optimal performance and accuracy. Use a soft, dry cloth to wipe the screen and exterior. Avoid harsh chemicals or abrasive materials. Gently remove dust or debris from vents and sensors to maintain proper temperature readings. For stubborn marks, lightly dampen the cloth with water, but avoid moisture seeping inside. Cleaning helps prevent malfunction and ensures reliable operation. Schedule periodic cleaning to keep your thermostat functioning at its best and extend its lifespan.
8.2 Updating Firmware
Regular firmware updates ensure your thermostat operates with the latest features and improvements. Connect your thermostat to Wi-Fi to enable automatic updates. To manually check for updates, navigate to the settings menu, select “Update,” and follow on-screen instructions. A stable internet connection is essential during the update process. Allow the system to complete the update without interruption to prevent issues. Updated firmware enhances performance, security, and compatibility, ensuring your thermostat functions optimally and supports advanced features like smart response technology and remote monitoring.
Thank you for following the Honeywell RTH6580WF installation manual. Your thermostat is now set up to enhance your home comfort with smart energy efficiency features.
9.1 Final Tips for Optimal Performance
For the best experience with your Honeywell RTH6580WF, ensure regular firmware updates, clean the screen periodically, and maintain stable Wi-Fi connectivity. Schedule temperature adjustments to align with your daily routine and use Smart Response Technology for efficient heating and cooling. Properly register your device for remote access and utilize energy-saving features to maximize efficiency. Refer to the manual for troubleshooting tips and enjoy seamless control over your home’s climate system.